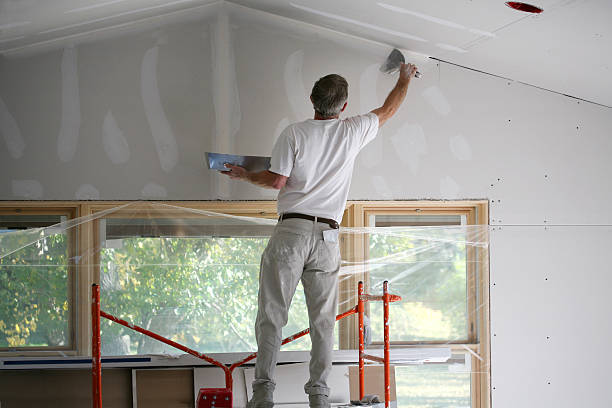
Taping Tips for Seamless Drywall Joints: Achieve a Professional Finish
Creating seamless drywall joints is key to a high-quality wall finish. Without proper taping, your walls can end up with visible seams, cracks, and imperfections that will be noticeable even after painting. This guide covers essential taping tips and techniques used by professionals to help you achieve a flawless drywall finish.
Why Proper Taping is Crucial for Drywall Joints
Taping drywall joints not only hides the seams between sheets but also strengthens the joint and prevents cracks from forming over time. A well-executed taping job ensures a smooth surface, setting the foundation for painting or texturing. Poor taping, on the other hand, can result in unsightly bumps and cracks, reducing the overall quality of the finish.
Tools and Materials Needed for Drywall Taping
Before you begin taping, make sure you have the following tools and materials:
- Drywall Tape: Choose between paper tape for strength or fiberglass mesh tape for ease of use.
- Joint Compound: Use an all-purpose or lightweight compound for a smoother application.
- Taping Knife: A 6-inch and a 12-inch knife are essential for applying and feathering the compound.
- Hawk or Mud Pan: For holding the joint compound while you work.
- Sanding Block: To smooth out the compound once it’s dry.
Pro Tip: Use paper tape for corners and high-stress areas to reduce the risk of cracking.
Step-by-Step Guide for Taping Drywall Joints
Follow this professional step-by-step guide to achieve seamless drywall joints:
1. Apply the First Layer of Joint Compound
Start by spreading a thin layer of joint compound along the seam using a 6-inch taping knife. Keep the layer smooth and even to ensure the tape adheres properly.
2. Embed the Drywall Tape
Place the tape over the wet joint compound and press it down gently with the taping knife. Make sure there are no air bubbles or wrinkles. This step reinforces the seam and helps prevent future cracks.
3. Apply the Second Coat of Joint Compound
Once the first coat is dry, apply a second, wider coat of joint compound using a 12-inch knife. Feather the edges to blend the compound seamlessly with the surrounding drywall.
4. Sand the Surface Smooth
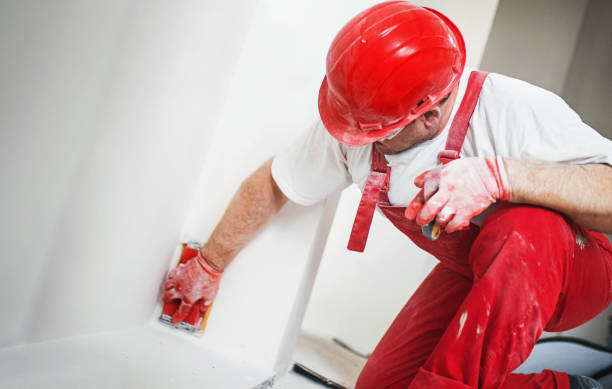
After the compound has dried completely, lightly sand the joint to remove any high spots or rough edges. Be careful not to sand through the tape.
5. Apply a Final Coat and Finish
For a truly seamless finish, apply a thin third coat of compound. Feather it out wider than the previous coats and let it dry. Sand it once more for a smooth, flawless surface.
Explore more advanced taping techniques at HD Drywall Services.
Common Mistakes to Avoid When Taping Drywall Joints
Taping drywall may seem straightforward, but there are several common mistakes that can compromise the quality of the finish. Here’s what to avoid:
- Using Too Much Joint Compound: Excess compound takes longer to dry and is harder to sand. Apply thin, even layers for the best results.
- Skipping the Sanding Step: Skipping sanding can leave visible ridges and imperfections that show through the paint.
- Choosing the Wrong Type of Tape: Mesh tape is easier to use but may crack over time in high-stress areas. Paper tape provides more strength but requires precise application.
Pro Tip: Use a bright light or a flashlight at an angle to spot imperfections before moving on to the next coat.
Choosing the Right Type of Drywall Tape
Selecting the right type of tape for your project can make a big difference in the final result. Here’s a quick comparison:
- Paper Tape: Strong and durable, ideal for corners and stress-prone areas. Requires a coat of joint compound before application.
- Fiberglass Mesh Tape: Self-adhesive and easier to work with, but less strong than paper tape. Best for quick repairs and less critical areas.
Visit HD Drywall’s Professional Tips for more insights on choosing the right materials for your project.
Advanced Taping Techniques for Seamless Joints
For those looking to achieve a truly professional finish, consider these advanced techniques:
Butt Joint Taping
Butt joints occur where the ends of drywall sheets meet. These joints are tricky because they don’t have recessed edges. To achieve a smooth finish, feather the joint compound wider on both sides, creating a gradual taper.
Corner Taping
Use a corner trowel to apply joint compound to inside corners. Fold the paper tape lengthwise and press it into the corner, then smooth it out with a taping knife. This method creates a sharp, clean line in the corner.
Wet Sanding
For a dust-free sanding option, use a damp sponge to smooth the joint compound. Wet sanding is ideal for smaller projects and helps reduce airborne dust.
Check out more expert techniques at HD Drywall.
FAQs About Taping Drywall Joints
What type of joint compound should I use for taping? All-purpose joint compound is versatile and easy to work with, making it a popular choice for taping. Lightweight compound is also a good option for its smooth application.
How long does joint compound take to dry? Drying time varies depending on the thickness of the application and humidity levels. Generally, it takes 24 hours to dry completely.
Can I use mesh tape for all drywall joints? While mesh tape is easier to use, it’s best suited for smaller repairs and areas with less stress. Paper tape is recommended for corners and high-stress joints.
How do I fix bubbles under the drywall tape? Bubbles occur when the tape isn’t pressed firmly into the joint compound. To fix this, cut out the bubbled area with a utility knife, reapply compound, and retape.
Is it necessary to sand between coats of joint compound? Yes, sanding between coats helps remove imperfections and ensures a smooth surface for the next layer.
What’s the best way to clean up after taping? Use a damp cloth to wipe down your tools and workspace. Rinse your taping knives and mud pan immediately after use to prevent the compound from hardening.
Conclusion
Taping drywall joints is a skill that requires patience, precision, and the right techniques. By following these expert tips, you can achieve seamless joints and a flawless finish every time. Whether you’re working on a small patch or a full room renovation, mastering drywall taping will elevate the quality of your project.
For professional help or additional guidance, contact HD Drywall.

