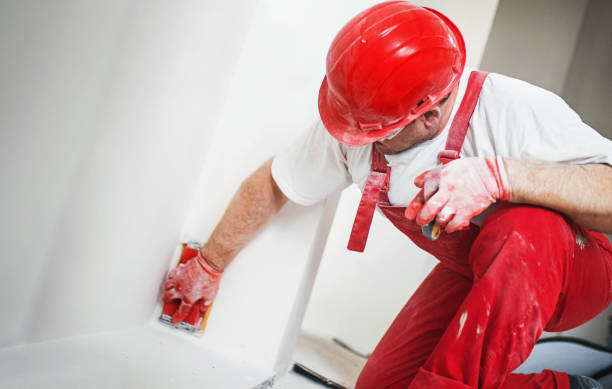
Professional Techniques for Drywall Finishing: Achieve a Perfect, Seamless Look
Drywall finishing is the key to creating smooth, flawless walls in any construction or renovation project. Professional techniques for drywall finishing ensure that the final appearance is polished and ready for painting. This guide explores the essential steps and expert methods used by professionals to achieve a perfect drywall finish.
Why Drywall Finishing is Crucial for Your Home
The process of finishing drywall goes beyond simply covering up seams. It’s about creating a surface that’s even, durable, and aesthetically pleasing. Poor finishing can lead to visible seams, bubbles, and uneven surfaces that are difficult to fix once the paint is applied. By using professional drywall finishing techniques, you ensure a high-quality result that enhances the overall look of your home.
Essential Tools and Materials for Drywall Finishing
Before diving into the process, make sure you have the following tools and materials:
- Joint Compound (Mud): This is used to cover seams and imperfections.
- Drywall Tape: Reinforces seams and prevents cracking.
- Taping Knife: For spreading joint compound evenly.
- Sanding Block: Smooths the surface after the joint compound has dried.
- Corner Bead: Provides a crisp, straight edge on corners.
- Mixing Tray and Drill: To mix joint compound for an even consistency.
Pro Tip: Use lightweight joint compound for easier application and sanding.
Step-by-Step Guide to Professional Drywall Finishing
To achieve a flawless drywall finish, it’s crucial to follow a step-by-step process that professionals use. Here’s how to get it done right:
1. Apply the First Coat of Joint Compound
Begin by covering the seams between drywall sheets with joint compound. Use a taping knife to spread a thin layer of mud along the seams. Be sure to feather the edges to blend the compound smoothly with the drywall surface.
2. Embed the Drywall Tape
Place drywall tape over the wet joint compound. Press it down gently with the taping knife, ensuring there are no air bubbles. This step reinforces the seams and helps prevent cracks.
3. Add a Second Coat of Joint Compound
After the first coat has dried, apply a second, slightly wider coat of joint compound over the tape. Feather the edges again to avoid creating a noticeable ridge. Let it dry completely before moving to the next step.
4. Finish with a Third Coat
For a professional-quality finish, apply a third coat of joint compound. This coat should be the widest, covering any visible imperfections. Use long, smooth strokes with your taping knife for the best results.
5. Sand the Surface Smooth
Once the final coat is dry, use a sanding block or pole sander to smooth the surface. Sand lightly to avoid creating dips or gouges. This step is crucial for achieving a seamless finish that’s ready for priming and painting.
Visit HD Drywall Services for more advanced finishing options and professional assistance.
Common Mistakes to Avoid During Drywall Finishing
Even experienced DIYers can make mistakes when finishing drywall. Here are some common issues and how to avoid them:
- Over-sanding: Sanding too aggressively can damage the drywall tape and create a rough surface.
- Skipping the Primer: Applying primer before painting is essential for a consistent finish. Primer seals the joint compound and prevents paint absorption differences.
- Using Too Much Joint Compound: Excess mud can lead to longer drying times and make sanding more difficult.
Pro Tip: Always work with thin, even layers of joint compound for the best results.
How to Finish Inside and Outside Corners
Corners can be tricky, but with the right technique, you can achieve sharp, clean lines. Here’s how to handle inside and outside corners:
Inside Corners
For inside corners, apply a thin layer of joint compound on both sides. Press drywall tape into the corner, then use your taping knife to smooth it out. Apply a second coat of compound once the first has dried, feathering the edges for a smooth finish.
Outside Corners
Use a metal corner bead to protect outside corners from damage. Attach the bead with drywall screws, then cover it with joint compound. Feather the edges out at least 6 inches on both sides of the corner for a seamless look.
Explore more tips on corner finishing at HD Drywall’s Professional Tips.
FAQs About Professional Drywall Finishing
What is the best type of joint compound to use? Lightweight joint compound is ideal for most projects due to its easy application and sanding. However, for areas requiring durability, consider using setting-type joint compound.
How many coats of joint compound are necessary for a smooth finish? Three coats are typically needed: the first to cover the seams, the second to smooth the surface, and the third to perfect the finish.
How do I prevent bubbles in drywall tape? Ensure that the joint compound underneath the tape is smooth and free of air pockets. Press the tape firmly with a taping knife to remove any trapped air.
Can I paint directly over joint compound? No, it’s recommended to apply a primer first. Primer helps the paint adhere evenly and prevents the joint compound from absorbing the paint differently than the drywall.
What’s the difference between joint compound and spackle? Joint compound is used for larger projects and finishing seams, while spackle is intended for small holes and minor repairs.
How do I handle uneven drywall seams? Feather the joint compound wider on both sides of the seam. This technique helps blend the seam into the wall surface, making it less noticeable.
Conclusion
Mastering professional techniques for drywall finishing can elevate the quality of your home renovation projects. Whether you’re a seasoned DIYer or a beginner, following these steps ensures a seamless, polished result. Remember, patience and attention to detail are key to achieving a perfect finish.
For expert help or to learn more about advanced drywall techniques, contact HD Drywall.


